
Why Scan a Network in the First Place?
Imagine a network that covers an office complex. A security guard who makes his rounds does not merely look at the door of the building but checks what's going on inside, whether all the doors are locked or some of them are open. This is basically how network scanning works — it helps find which devices are online, which of their ports are open, and what is running on them.
These tasks are performed by two entirely different individuals for two completely different reasons: an attacker needs to find a way in before being noticed, whereas a defender needs to do the same thing but from the other side of the coin. It is the same technique; the goal and the permission behind it are different.
It is also usually the first practical skill that anyone learns during their time in a security-related profession, before ever trying something that looks remotely like hacking. All pentesting, SOC audits, and red-team activities start the same way — by mapping out what the system consists of without making any changes at all.
The Five Stages of Network Scanning
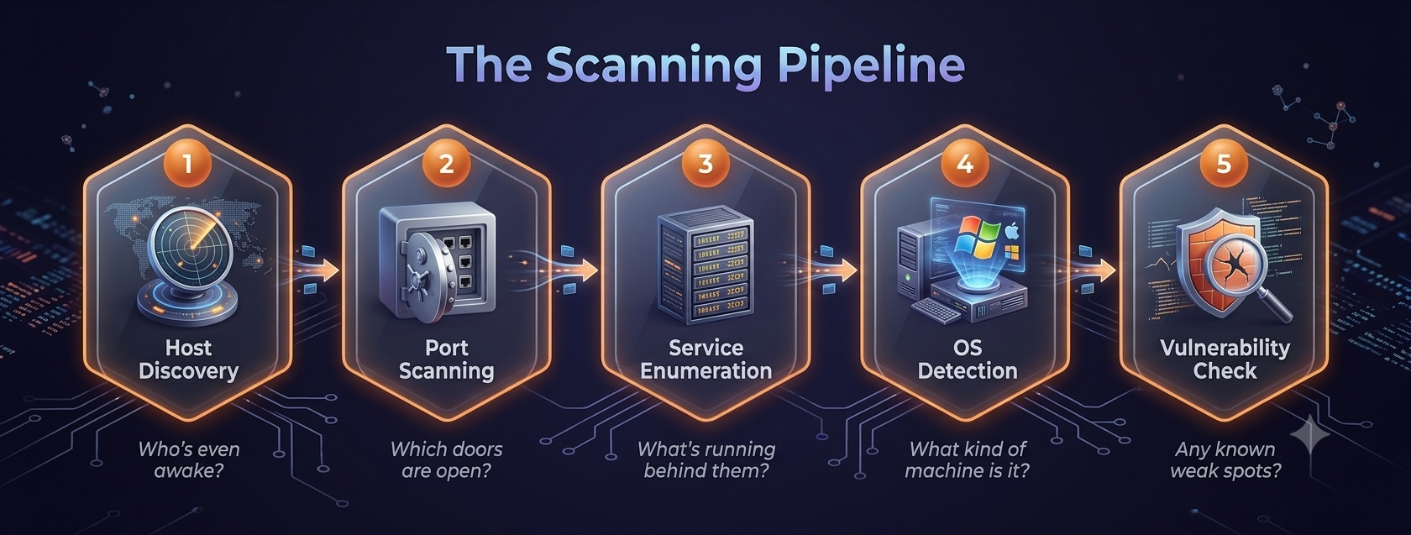
Most scans, however complex the tool, boil down to the same five stages:
- Host Discovery — Finding a host is the first step because there's no use knocking on doors when nobody is home. Ping or ARP can help find out which addresses out of all possible ones in a range have a listener.
- Port Scanning — After that, ports need to be scanned to find out which of 65,535 possible "doors" is going to respond.
- Service Enumeration — Finds out what exactly is running on the open port: a web service, a mail service, a database, and sometimes even what particular version it is.
- OS Detection — Tries to identify the operating system running on a device by analyzing its behavior.
- Vulnerability Identification — Ties all this information together by cross-referencing known vulnerabilities for that particular OS and software versions.
What This Looks Like in Practice
Let's consider a small network with an address range of 192.168.1.0/24. During the initial network sweep, a lightweight ping is sent to each address, waiting for replies:
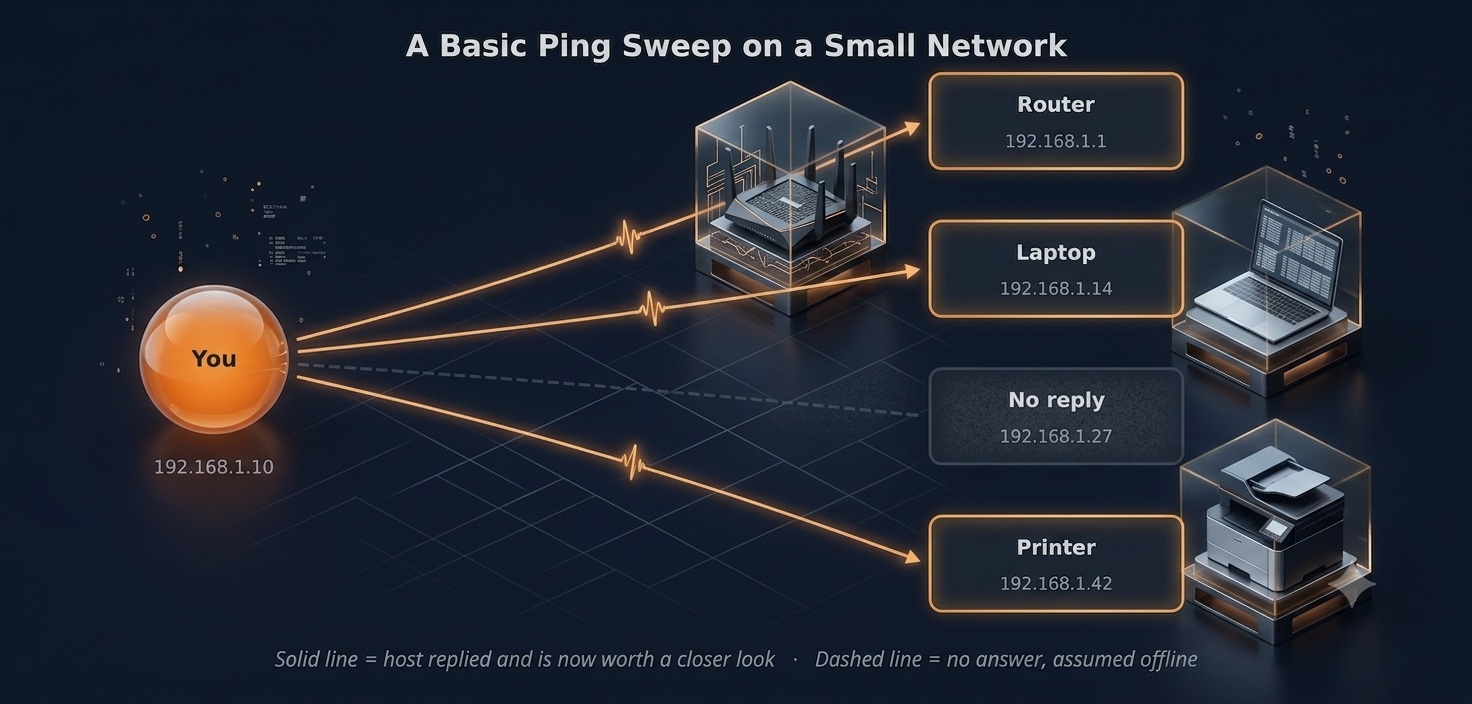
From this, we can infer that the Router, Laptop, and Printer have replied back, hence are live on the network, whereas there is no reply from 192.168.1.27 — meaning no device has that IP or it is powered down.
A one-line command captures the whole idea using Nmap:
nmap -sn 192.168.1.0/24This command asks "Are you there?" to all addresses in that range and lists the ones that answer. Everything that follows in actual scanning is only done on those live hosts.
The Toolbox: What Analysts Actually Reach For
No exotic Hollywood software required. A small handful of free, well-documented tools cover almost every beginner scenario:
| Tool | Purpose |
|---|---|
| Nmap | The Swiss Army knife — host discovery, port scanning, service/OS detection |
| Masscan | Scans the entire internet in minutes (use responsibly) |
| Netcat | Manual banner grabbing and connection testing |
| Wireshark | Deep packet inspection and traffic analysis |
| RustScan | Blazing-fast port scanner, feeds results to Nmap |
Learning one tool well beats skimming five. Most beginners start with Nmap and branch out once they're comfortable reading its output.
Reading the Results Like an Analyst
A scan does not give a mere yes/no answer for each port, but one of three responses:
- Open — The port is accepting connections. Someone is home.
- Closed — The port is reachable but nothing is listening. The door exists but it's locked.
- Filtered — A firewall or filter is blocking the probe. The door might be open or closed — you can't tell from outside.

A Small Scenario
Suppose a junior analyst is tasked to examine a lab environment of twelve devices before a training drill. Host discovery reveals only nine live devices. Port scanning those nine shows one machine listening on port 21 (FTP) — and it's an outdated version. Service enumeration confirms the version has a public advisory. Nothing has been hacked, nothing altered; everything was discovered by listening to what the network freely offered. That's how scanning works.
The One Rule That Matters
Everything mentioned above is perfectly legal, useful, and taught in entry-level security courses — as long as it is performed on a network you own or have explicit written permission to test. Scanning someone else's network without permission crosses from "security testing" into hacking. The legal system in most countries does not care about your intentions.
Always scan responsibly. Get permission in writing before scanning any network that isn't yours. Unauthorized scanning can be illegal and is almost certainly against the terms of service of any hosting provider.
Key Points
- Scanning is a task of inventory-taking, not an attack.
- Most scans involve five steps: discovery, port scanning, enumeration, OS fingerprinting, and vulnerability checking.
- The same methods are used by both attackers and defenders — intent and authorization are what differentiate them.
- Never scan a network that isn't yours without explicit permission.
Further Reading: Nmap Official Documentation (nmap.org/book), OWASP Testing Guide, SANS Institute Reading Room.